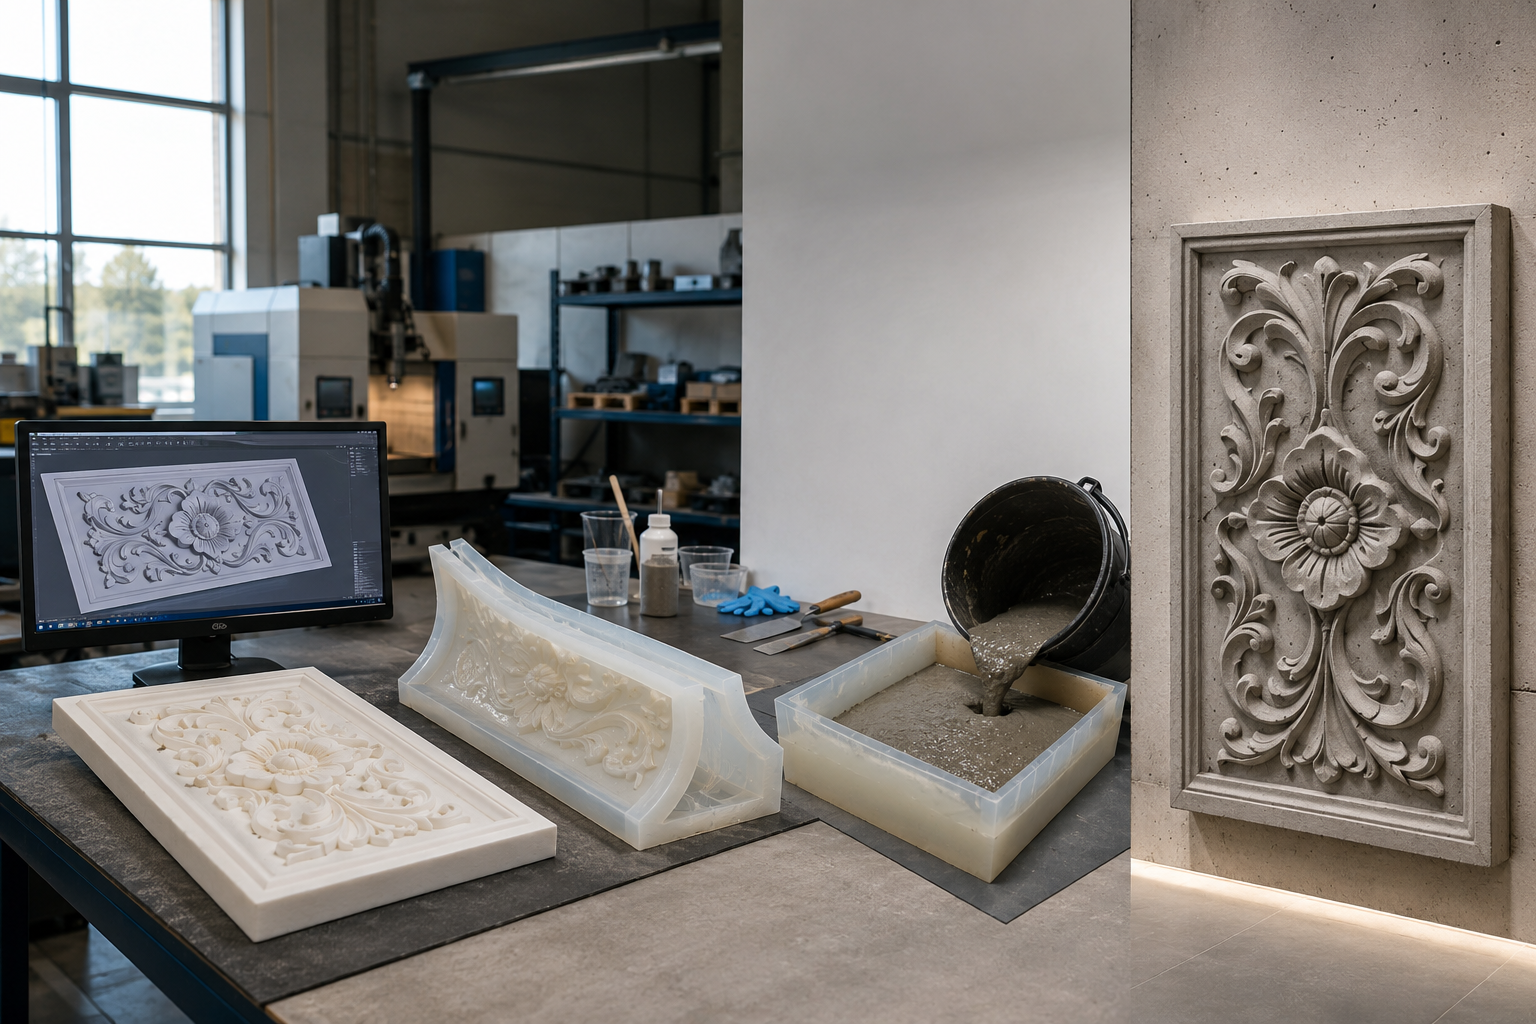
If you've ever admired a decorative concrete wall panel, a custom architectural column, or an intricately textured concrete planter, chances are it started its life not in a workshop with hand tools, but on a computer screen. Today, the process of turning a digital design into a physical concrete product has been transformed by 3D printing technology — and at the center of that transformation is the master pattern.
At Solidus 3D Modeling, we work with architects, concrete fabricators, product designers, and manufacturers every day to bridge the gap between CAD files and finished concrete castings. In this post, we'll walk you through exactly how the process works, why 3D printed master patterns have become the industry standard for custom silicone molds, and what this means for anyone working in decorative or architectural concrete.
What Is a Master Pattern, and Why Does It Matter?
A master pattern is the original physical model used to create a mold. Think of it as the "parent" object — every silicone mold, and every concrete piece cast from that mold, is a direct copy of this single pattern. If the master pattern has a flaw, that flaw gets reproduced in every single unit that follows. If it's perfect, you get consistent, repeatable results across an entire production run.
Traditionally, master patterns were carved, sculpted, or machined by hand. This worked, but it was slow, expensive, and difficult to replicate exactly if the pattern was ever damaged or needed revision. Enter 3D printing.
The Shift from Hand-Sculpted to Digitally Printed Patterns
3D printing has changed the game for anyone producing custom concrete molds. Instead of relying on manual fabrication, designers can now create a digital 3D model — whether that's a decorative relief pattern, a custom architectural profile, a branded logo piece, or a complex geometric texture — and print it directly as a physical master pattern with a high-resolution 3D printer.
This shift matters for a few key reasons:
- Precision. CAD-designed and 3D printed patterns achieve tolerances and surface detail that are extremely difficult to replicate by hand.
- Repeatability. Because the pattern originates from a digital file, it can be reprinted identically if it's ever damaged, lost, or needs to be scaled.
- Speed. What might take days or weeks to hand-sculpt can often be printed in hours.
- Complexity. Intricate textures, undercuts, organic shapes, and fine architectural detailing that would be nearly impossible to carve by hand are entirely achievable with additive manufacturing.
The Full Process: From CAD File to Finished Concrete Product
Let's break down exactly how a design goes from a digital concept to a finished decorative concrete piece.
Step 1: CAD Design and Digital Modeling
Everything begins with a 3D CAD model. This could be an original design created from scratch, a scan of an existing object, or a reproduction of an architectural element that needs to be matched or restored. At this stage, our team works closely with clients to refine geometry, ensure proper draft angles for demolding, and account for material shrinkage — all critical details that affect how well the final mold will perform.
Step 2: 3D Printing the Master Pattern
Once the design is finalized, the file is sent to a 3D printer to produce the physical master pattern. Depending on the size, detail level, and intended use, we select the appropriate printing technology and material to ensure the pattern has a smooth, mold-ready surface finish. This is a crucial step — any texture or imperfection on the printed pattern will transfer directly into the silicone mold, and from there, into every concrete casting.
Step 3: Post-Processing the Pattern
3D printed parts often require some finishing work before they're ready to be molded. This can include sanding, sealing, or applying a release-friendly coating to the surface. Proper post-processing ensures the pattern releases cleanly from the silicone during mold-making and prevents surface defects from carrying through to the final product.
Step 4: Building the Silicone Mold
With the finished master pattern in hand, we build a custom silicone mold around it. Silicone is the material of choice for this application because it captures fine surface detail with exceptional accuracy, flexes enough to release undercuts and complex geometry without damaging the concrete casting, and holds up to repeated use across hundreds of pours without degrading.
The silicone is poured or brushed around the pattern, cured, and carefully removed to reveal a negative impression — this is the working mold that will be used for production.
Step 5: Casting in Concrete
Once the silicone mold is complete, it's ready for concrete casting. Manufacturers can pour standard concrete, GFRC (glass fiber reinforced concrete), or specialty decorative concrete mixes directly into the mold. Because silicone molds are flexible and non-stick by nature, they release cleanly from cured concrete without damaging fine details, sharp edges, or textured surfaces — something rigid molds often struggle with.
Why This Process Is Ideal for Decorative and Architectural Concrete
Decorative and architectural concrete projects demand a level of detail and consistency that traditional mold-making methods can struggle to deliver at scale. Here's where the CAD-to-3D-print-to-silicone workflow really shines:
Custom architectural elements. Columns, cornices, corbels, and facade panels often need to match existing historical details or fit a very specific design vision. A 3D printed master pattern lets fabricators recreate these details with accuracy that hand-sculpting simply can't match consistently.
Branded and textured surfaces. Whether it's a custom logo embossed into a concrete bench, a unique surface texture for a feature wall, or a repeating geometric pattern for pavers, digital design and 3D printing make it possible to produce exactly what was envisioned — no interpretation required.
Small-batch and prototype runs. Not every project needs thousands of units. For smaller production runs or one-off architectural features, this process is far more cost-effective than traditional mold tooling methods like CNC-machined molds or metal casting patterns.
Design iteration. Because the entire process starts with a CAD file, revisions are simple. Need to adjust a dimension, tweak a texture, or resize a pattern? Update the digital file and print again — no need to start the sculpting process over from scratch.
Materials and Design Considerations for Concrete Molds
Not every 3D print or every silicone is created equal, and getting the details right up front saves significant time and cost down the line. A few things we always factor in when developing custom concrete molds:
- Draft angles to ensure the finished concrete piece releases cleanly from the mold without cracking or sticking.
- Wall thickness and shrinkage tolerances specific to the type of concrete or GFRC mix being used.
- Silicone durometer (hardness) selection based on how much detail needs to be captured and how many times the mold will be reused.
- Surface finish on the master pattern, since every micro-texture from the printed pattern transfers into the final concrete surface.
Why Work with a Specialist for This Process
While 3D printing and mold-making both sound straightforward on paper, the reality is that dialing in the right combination of CAD design, print settings, pattern finishing, and silicone formulation takes real experience. A pattern that looks perfect on screen can still fail to release properly, warp during curing, or lose detail fidelity if these variables aren't accounted for correctly.
This is exactly the kind of work we specialize in at Solidus 3D Modeling. We help architects, concrete fabricators, and product manufacturers take a design from an initial CAD concept all the way through to a production-ready silicone mold — handling the 3D printing, pattern finishing, and mold-building in-house so our clients get a finished tool that's ready to go straight into concrete production.
Final Thoughts
The combination of CAD design, 3D printing, and silicone mold-making has fundamentally changed what's possible in custom concrete manufacturing. Projects that once required weeks of hand-sculpting and specialized tooling can now be designed, printed, and molded in a fraction of the time — with a level of precision and repeatability that traditional methods can't consistently match.
Whether you're an architect looking to reproduce a historic detail, a fabricator developing a new decorative concrete product line, or a designer bringing a completely original concept to life, this CAD-to-concrete workflow offers a faster, more precise, and more flexible path to production.
Interested in developing a custom silicone mold for your next concrete project? Get in touch with our team to discuss your design and find out how our 3D printing and mold-making process can bring it to life.

No replies yet
Start the discussion
Be the first to ask a follow-up question or add practical insight about this topic.